I was standing in my tiny apartment hallway last Tuesday, staring at a lumpy, chipped terracotta planter that had seen better days, feeling that familiar wave of “why is everything so expensive?” Most DIY influencers will tell you that you need a professional studio setup or a dozen high-end tools to get a flawless finish, but honestly? That’s a lie. Learning how to spray paint isn’t about achieving a showroom-perfect shine on your first try; it’s about knowing how to stop the drips and avoid that dreaded orange-peel texture that makes a project look cheap. I’ve spent way too many weekends covered in metallic mist, learning the hard way so you don’t have to.
In this guide, I’m skipping the fluff and the “aesthetic” nonsense to give you the actual, gritty mechanics of the process. We’re going to talk about the real stuff: how to prep a surface so the paint doesn’t flake off in a month, how to manage your spray distance without losing your mind, and how to time your coats so you aren’t wasting money on extra cans. I promise to show you a method that is actually functional, even if your workspace is just a corner of your balcony.
Table of Contents
Guide Overview
Tools & Supplies
- Spray paint cans (the primary coating agent)
- Drop cloths (to protect the surrounding surface)
- Painter's tape (to mask off areas not being painted)
- Sandpaper (to smooth the surface before application)
- Surface cleaner or degreaser (1 bottle/can)
- Primer (1-2 cans depending on surface size)
- Spray paint (2-4 cans depending on surface size)
Step-by-Step Instructions
- 1. First things first: clear a space and grab some old newspapers or a drop cloth. I used to think I could just spray paint on my patio and be fine, but trust me, the overspray travels further than you think. You want to create a little “no-fly zone” for the paint so you aren’t scrubbing pigment out of your driveway for the next three weeks.
- 2. Scrub the item down like your life depends on it. If you’re painting an old metal chair or a wooden side table, don’t skip this. Use some warm soapy water or a bit of degreaser to get rid of the dust, oils, and mystery grime. If the surface isn’t actually clean, the paint is going to peel off in little flakes within a month, and then you’ve just wasted your money and your Saturday.
- 3. Sanding is the unglamorous part, but it’s the secret sauce. You don’t need to sand it down to the raw material, but you do want to take the shine off the existing finish. Grab a medium-grit sandpaper and just give it a quick scuff. This creates tiny “teeth” for the new paint to grab onto so it stays put.
- 4. Once it’s clean and sanded, wipe it down one last time with a tack cloth or a damp microfiber rag. I’m serious—even a single stray hair or a tiny bit of dust can turn into a permanent bump once the paint dries. I always keep a small multi-tool in my bag, but in this case, I wish I had a lint roller to get those last few pesky particles off the surface.
- 5. Now, for the actual painting: shake that can like it owes you money. Most people don’t shake the can long enough, and that’s why you get inconsistent colors. When you’re ready, hold the can about 8 to 12 inches away from your project. Don’t try to cover the whole thing in one go; that’s how you end up with those ugly, dripping puddles that take forever to dry.
- 6. Aim for “misty” layers rather than heavy coats. Start your spray just off to the side of the object, sweep across it in a steady motion, and stop the spray once you’ve passed the other side. Do three or four very thin layers instead of one thick one. It might feel like you aren’t doing enough at first, but this is how you get that smooth, professional look without the mess.
- 7. Finally, just leave it alone. I know it’s tempting to touch it five minutes later to see if it’s dry, but resist the urge. Let it sit in a dust-free spot for at least 24 hours before you try to move it or put anything back on top of it. Patience is a tool, just like any other, and it’s the only way to make sure your hard work actually lasts.
Mastering Spray Paint Surface Preparation for Real Results
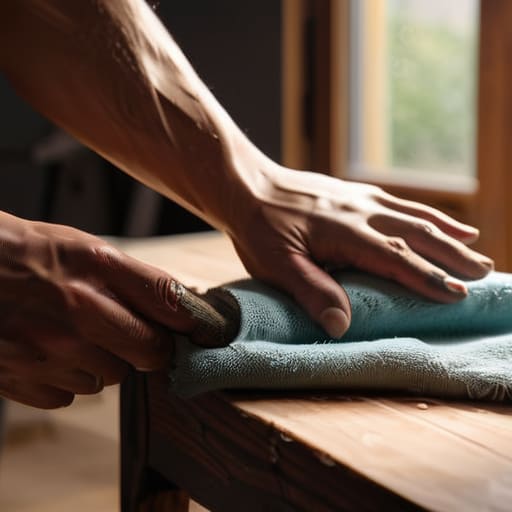
Look, I know the temptation to just grab the can and start spraying is real—especially when you’re staring at a piece of furniture that’s been looking drab for months. But if you skip the prep, you’re basically just asking for a headache. Real spray paint surface preparation isn’t about being a perfectionist; it’s about making sure you don’t have to do the whole job twice. I always start by giving everything a serious scrub with a degreaser. If there’s even a hint of dust or old furniture wax left behind, your new coat is going to peel off in sheets, and that is a massive waste of both time and money.
Once it’s clean, don’t skip the primer. I used to think it was an extra, unnecessary step, but learning how to use spray paint primer properly changed everything for me. It acts like the glue between your object and the color. Also, please, for the love of your lungs, grab some spray painting safety gear. A decent mask and some gloves aren’t “extra”—they’re essential for staying comfortable while you work.
Choosing the Best Spray Paint for Diy Projects That Last
Honestly, the biggest mistake I see people make is grabbing the cheapest can on the shelf because it’s on sale. I get it—we’re all trying to stretch our budgets—but cheap paint often has a lower pigment density, which means you’ll end up doing five coats instead of two. If you want to save time and sanity, look for the best spray paint for DIY projects that specifically mentions a “high-coverage” or “all-surface” formula. Brands like Rust-Oleum or Krylon are my go-tos because they actually behave predictably, which is half the battle when you’re trying to avoid a total mess.
Don’t forget that the paint is only as good as the foundation you build underneath it. If you’re working with something tricky like plastic or metal, don’t skip the step of learning how to use spray paint primer effectively. A good primer acts like the glue between your surface and your color, ensuring that beautiful finish doesn’t start peeling off in six months. It might feel like an extra step when you just want to get started, but investing in a quality primer is the secret to making your DIY look like a professional job rather than a weekend experiment.
Pro-Tips I Learned the Hard Way (So You Don't Have To)
- Don’t try to hide the old color in one go; your instinct will be to blast it on thick to get coverage, but that’s a one-way ticket to a sticky, dripping mess. Do three or four super thin, “misty” coats instead. It takes longer, but it actually looks professional.
- Shake that can like your life depends on it. I know it sounds dramatic, but if you don’t shake it for at least a full two minutes, you’re going to end up with uneven pigment and a finish that looks blotchy and cheap.
- Watch your distance. If you get too close, you get runs; if you stay too far away, the paint dries in the air and leaves you with a gritty, sandpaper texture. Aim for about 8 to 12 inches—roughly the length of my multi-tool—and keep it moving.
- Always start your spray pattern off the object. Start spraying into the air next to your project, sweep across, and stop spraying once you’ve passed the other side. This prevents those awkward “blobs” of paint that always happen right at the start or end of a stroke.
- Test your spray on a piece of cardboard first. Every can is a little different, and I’ve wasted way too many cans of expensive matte black because I didn’t realize the nozzle was spitting out larger droplets than I expected.
The Real-World Cheat Sheet
Don’t skip the cleaning part; if there’s even a tiny bit of dust or grease left on your project, you’re basically just painting over a disaster waiting to happen.
Forget about trying to get it perfect in one go—light, thin coats are your best friend to avoid those annoying drips that take forever to sand out.
Save your money by buying the right paint for the job the first time, because cheap cans usually end up requiring way more layers and a lot more frustration.
The Reality Check
“Forget the Pinterest-perfect tutorials that make it look like magic; spray painting is mostly just the unglamorous work of scrubbing off old grime and being patient enough to let things dry so you don’t end up with a sticky, expensive mess.”
Maya Sterling
Don't Sweat the Small Stuff
At the end of the day, spray painting is really just about the prep work and having a bit of patience. If you’ve scrubbed that surface clean, picked a paint that actually matches your project’s needs, and remembered to do those thin, even coats instead of trying to cover everything in one go, you’ve already done the hard part. You don’t need a professional studio setup or a pristine garage to get a decent result; you just need to trust the process and keep your environment as dust-free as possible. It’s much better to spend an extra twenty minutes cleaning a surface now than to spend your entire weekend trying to sand down bumps caused by a rushed job.
I know that first spray can feel a little intimidating—especially when you’re worried about drips or uneven patches—but please don’t let the fear of a “mistake” stop you from trying. Most of the things that feel like disasters in the moment are actually just easy fixes with a little bit of sandpaper and another light coat. My goal isn’t for you to produce a museum-quality masterpiece, but to help you realize that you can transform your space without breaking the bank. So, grab your multi-tool, head outside, and just start painting. You’ve totally got this.
Frequently Asked Questions
How do I stop the paint from running or leaving those annoying drips halfway through?
Honestly, I used to get so frustrated by those annoying drips, especially when I was working on a project late at night. The trick is all about the “mist coat.” Don’t try to cover everything in one heavy pass; that’s a recipe for a mess. Start with a very light, almost translucent layer to tack it down, let it dry, and then build up slowly. Keep your hand moving constantly—think of it like a steady rhythm.
Can I actually spray paint something if I'm working in a small apartment or a garage without making a massive mess?
Honestly, I used to be terrified of this. Living in a small apartment, the thought of overspray coating my balcony or my neighbor’s windows was enough to make me quit. But you absolutely can do it—you just have to be intentional. If you’re in a garage, use heavy cardboard to create a “splash zone.” In an apartment, I swear by a pop-up privacy tent or even just a large plastic drop cloth. It’s all about containment.
How long do I really have to wait between coats before I accidentally ruin the finish?
Look, I get the urge to rush—I’ve definitely been there, standing over a project waiting for it to dry so I can finally call it done. But if you spray too soon, you’ll end up with those annoying drips or a gummy mess that’s impossible to fix. Check the can, but generally, give it about 15 to 30 minutes between light coats. If it feels tacky or soft, walk away and grab a coffee. Patience saves money.