
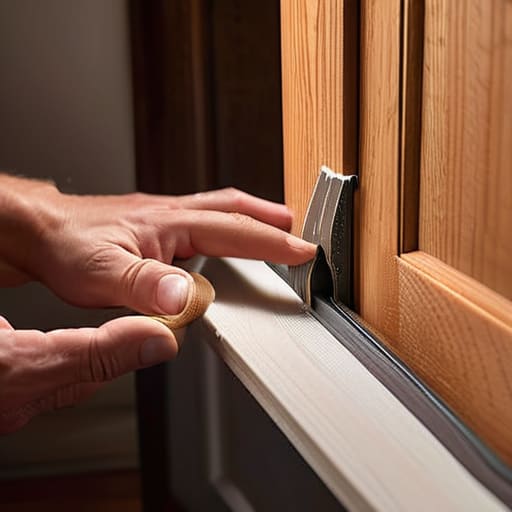
Last Tuesday, I was sitting on my sofa trying to actually enjoy a cup of tea when I felt it—that unmistakable, icy finger of wind sliding right under my front door. It’s one of those tiny, annoying things that makes you feel like your apartment is constantly fighting against you. I used to think that if my place felt drafty, I needed a whole new door or some expensive, high-end renovation, but that’s just not true. Most of the time, you don’t need a contractor; you just need to get serious about weatherstripping a door before your heating bill turns into a second mortgage.
I’m not here to show you some perfectly curated, Pinterest-ready home project where everything looks seamless and untouched. Instead, I want to walk you through the actual process of sealing those gaps using stuff you can find at any local hardware store. I’ll show you how to identify where the air is leaking, which materials won’t fall off in two weeks, and how to get it done without needing a PhD in carpentry. We’re going for maximum efficiency with minimum fuss, because at the end of the day, a warm home is way more important than a showroom-perfect entryway.
Table of Contents
- Step-by-Step Instructions
- Foam vs Rubber Weatherstripping Choosing What Actually Lasts
- Sealing Gaps Around Door Frames Without the Diy Drama
- Pro-Tips to Keep the Draft Out (and Your Sanity Intact)
- The Bottom Line: Don't Overthink It
- The Real Reason to Care
- The Bottom Line on Drafty Doors
- Frequently Asked Questions
Guide Overview
Tools & Supplies
- Measuring tape for determining strip lengths
- Scissors or utility knife for cutting material
- Microfiber cloth for cleaning surfaces
- Weatherstripping rolls or strips (adhesive or tension based)
- Rubbing alcohol or cleaner for surface preparation
Step-by-Step Instructions
- 1. First things first, you need to figure out what kind of “leak” you’re actually dealing with. Grab a flashlight and a piece of paper, and on a windy day, hold the paper near the door edges to see if it flutters. This tells you if you need adhesive foam strips for the sides or a more heavy-duty door sweep for that annoying gap at the bottom where the light peeks through.
- 2. Once you know your enemy, grab some isopropyl alcohol and a clean rag to clean the door frame. I know, cleaning feels like an extra chore, but if you don’t get that layer of dust and old grime off, your new weatherstripping is going to peel off in a week. You want that surface to be completely bone-dry before you even think about opening the adhesive backing.
- 3. If you’re using the peel-and-stick foam method (which is my go-to for a quick fix), start at the top corner of the door frame. Peel just a few inches of the backing at a time and press it firmly into the corner. The trick is to avoid overlapping the strips too much, or you’ll end up with a bulky, uneven mess that makes the door hard to close.
- 4. Now, work your way down the sides. As you go, take a second to actually close the door every few inches to make sure the seal is actually working and not just squishing the foam into nothingness. You want a snug fit, not a struggle that leaves you sweating every time you come home.
- 5. For the bottom of the door, you’ll likely be installing a door sweep. Most of these just screw right into the bottom of the door itself. I usually grab my multi-tool to pre-drill tiny pilot holes so I don’t split the wood. It’s a small step, but it’s the difference between a professional-feeling seal and a total DIY disaster.
- 6. Finally, do one last “light test.” Turn off the lights in your hallway and have someone stand on the other side of the door with a bright flashlight. If you see any light bleeding through the cracks, you’ve got a gap. Just grab a small piece of extra foam and patch it up until it’s dark. It’s not about being perfect; it’s about stopping the draft.
Foam vs Rubber Weatherstripping Choosing What Actually Lasts
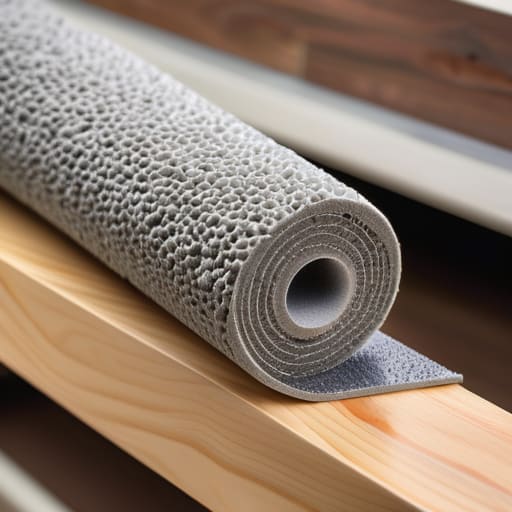
So, you’re standing in the hardware aisle, staring at a wall of sticky rolls, and wondering if there’s actually a difference or if it’s all just marketing fluff. Here’s the truth: there is a massive difference. If you’re just looking for a quick, cheap fix for a closet or a bedroom door that doesn’t get much action, foam is fine. It’s easy to peel and stick, but let’s be real—it’s basically glorified sponge. It tends to compress and lose its shape after a few months, which means you’ll be back here doing this all over again by next season.
If you want to do this once and actually forget about it, go with rubber. When it comes to foam vs rubber weatherstripping, rubber is the clear winner for any exterior door that faces the elements. It’s much more resilient against temperature swings and won’t disintegrate when the humidity hits. While it might be a slightly more annoying application, investing in rubber is the secret to energy efficient door sealing that actually holds up. It stays flexible, keeps its bounce, and does a much better job of blocking those annoying whistles from the wind.
Sealing Gaps Around Door Frames Without the Diy Drama
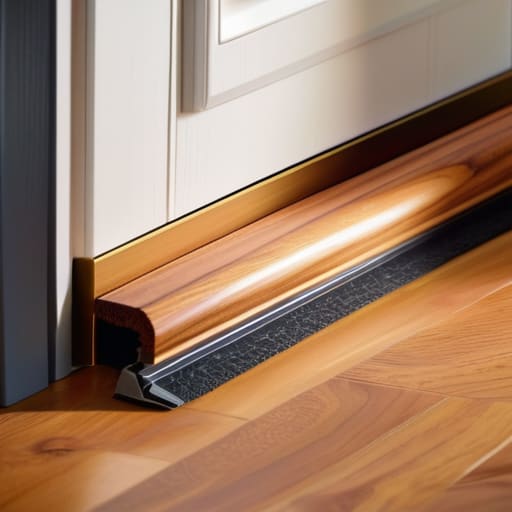
Let’s be real: even if you’ve nailed the sides and the top of the frame, that annoying gap at the very bottom is usually where the real battle is lost. I’ve spent way too many chilly evenings feeling a literal breeze tickle my ankles in my own living room. If you’re looking at preventing drafts under the door, don’t just assume a piece of foam tape will fix it. Often, you’re looking at a more robust door bottom seal installation to truly bridge that gap between the door and the threshold.
If your current setup looks more like a shredded piece of old sponge, it might be time for a full door sweep replacement guide approach rather than a quick patch job. It’s not about making the door look like it belongs in a magazine; it’s about actually stopping the air from hijacking your thermostat. Before you start drilling anything, just run your hand along the base. If you feel that distinct “whoosh” of cold air, you know exactly where to focus your energy. Keep it simple, keep it tight, and stop letting your hard-earned money escape through the cracks.
Pro-Tips to Keep the Draft Out (and Your Sanity Intact)
- Clean your door frame like your life depends on it before you start sticking anything to it. If there’s a layer of dust or old, crusty adhesive left behind, that new weatherstripping is going to peel off in a week, and you’ll be right back where you started. Grab some rubbing alcohol and a rag—it’s a quick step that saves so much frustration later.
- Don’t go overboard with the thickness. I’ve made the mistake of buying the heaviest, thickest foam thinking “more is better,” but all that does is make your door impossible to latch. You want a seal that’s snug, not a door that requires a shoulder tackle just to close it.
- Check the “sweep” at the bottom of the door, too. You can have the most perfect side seals in the world, but if there’s a massive gap at the threshold where the wind can just whistle right under, you’re basically fighting a losing battle. A simple door sweep is a total game-changer.
- Test your work with the “light test.” Once you think you’re done, turn off the lights in your hallway and have someone stand outside with a flashlight. If you see light peeking through any of those cracks, you’ve still got a gap that needs fixing. It’s way easier to fix it now than to realize you missed a spot when your heating bill arrives next month.
- Keep your multi-tool handy for the trimming. Most weatherstripping comes in long rolls, and trying to hack it to size with dull kitchen scissors is a recipe for a jagged, messy edge. A sharp blade or even a good pair of utility snips will give you those clean lines that actually stay seated in the frame.
The Bottom Line: Don't Overthink It
You don’t need a professional contractor or a perfectly manicured door to see results; just identify where the air is actually moving and plug those gaps.
Invest a little extra in rubber over cheap foam if you want to do this once and forget about it, rather than replacing it every single season.
Focus on the function, not the “look”—as long as that draft is gone and your energy bill drops, you’ve won the battle.
The Real Reason to Care
“At the end of the day, I don’t care if your door looks like it belongs in a Pinterest board; I just want you to stop paying to heat the entire neighborhood every time the wind picks up.”
Maya Sterling
The Bottom Line on Drafty Doors
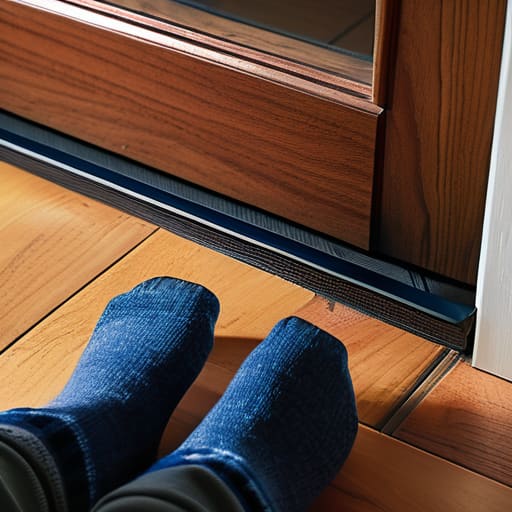
At the end of the day, weatherstripping isn’t about making your entryway look like it belongs in a high-end architectural magazine; it’s about making sure your living space actually feels like a sanctuary. We’ve covered the essentials: picking the right material so you aren’t replacing it in three months, sealing those pesky frame gaps, and ensuring you aren’t just throwing money out the window every time the temperature drops. Whether you went with the budget-friendly foam or invested a little more in the durable rubber, the goal remains the same: a tighter seal and a much lower utility bill. It might feel like a small, tedious task right now, but once that door clicks shut and you don’t feel that icy breeze hitting your ankles, you’ll realize it was one of the best small wins you could have tackled this season.
If you’re feeling a little intimidated by the prospect of a DIY project, just remember that you don’t need to be a master carpenter to make a real difference in your home. Most of these fixes take less time than it takes me to water my herb garden, and the payoff is immediate. We spend so much time worrying about the “big” renovations that we forget how much small, functional systems can actually change our daily comfort. So, grab your multi-tool, get those strips applied, and stop letting the weather dictate your indoor temperature. You’ve got this.
Frequently Asked Questions
I just replaced my weatherstripping, but the door still feels like it's dragging or hard to latch—did I mess something up?
Don’t panic—you probably didn’t “mess up,” you likely just overcompensated. If you used thicker material than the old stuff, you’ve essentially created a permanent roadblock for your door. Check if the stripping is sitting too deep in the groove or if you’ve applied it too heavily. Try trimming a tiny bit off the problematic area or checking your strike plate alignment. It’s a frustrating little adjustment, but we’ll get that door swinging smoothly again.
How often am I actually going to have to do this again before the strips start crumbling or peeling off?
Honestly, if you go with the good rubber stuff instead of the cheap foam, you shouldn’t have to touch it again for a few years. I usually check mine once a year when I’m doing my seasonal deep cleans. If you notice it’s getting brittle, peeling, or—worst case—actually squishing flat and losing its bounce, that’s your sign to swap it out. It’s a quick fix, so don’t sweat it too much.
Can I use this same stuff on my windows, or am I going to end up wasting money on the wrong type of seal?
Short answer: Yes, but don’t just grab whatever is on sale. Most of what we talked about for the door will work for windows, but you need to be a bit more strategic. For those tiny, annoying gaps in window sashes, thin adhesive foam is your best friend. If you’re dealing with a drafty old frame, stick with the rubber—it’s more durable and won’t compress into nothingness after one season. Just check the thickness first!
