
I was sitting on my floor last Tuesday, surrounded by three different instruction manuals and a pile of particle board that looked more like expensive sawdust than furniture, wondering why I hadn’t just given up. We’ve been sold this lie that learning how to build a desk requires a professional-grade workshop and a degree in carpentry, but honestly? That’s just a way to make us feel intimidated by something that should be simple. I spent years trying to force my workspace to look like a curated Pinterest board, only to realize that a “perfect” desk is useless if it wobbles every time you type an email or if it costs more than your monthly grocery budget.
In this guide, I’m stripping away the fluff and the fancy designer jargon to show you a real-world approach to creating a workspace that actually holds up. I’m going to walk you through the exact, messy process I used to build my own sturdy setup using basic tools and affordable materials you can find at any local hardware store. Forget the performative perfection; we are focusing on functional, budget-friendly methods that prioritize stability and smart organization over aesthetics. Let’s get to work.
Table of Contents
- Step-by-Step Instructions
- Choosing the Best Wood for Office Desks Without Overspending
- Minimalist Desk Construction Essential Woodworking Tools for Beginners
- Five Things I Wish I Knew Before I Picked Up a Drill
- The Bottom Line: Build for Use, Not for Show
- ## A Note on Getting Started
- The Finish Line (And Your New Workspace)
- Frequently Asked Questions
Guide Overview
Tools & Supplies
- Drill/Driver for fastening screws
- Measuring Tape for accurate cuts
- Sandpaper for smoothing edges
- Level to ensure a flat surface
- Wood Desktop (1 unit)
- Table Legs (4 units)
- Wood Screws (1 box)
- Wood Glue (1 bottle)
Step-by-Step Instructions
- 1. First things first, let’s talk about the foundation. Skip the expensive solid oak slabs you see in high-end showrooms; instead, head to your local hardware store and grab a pre-cut butcher block or even just a thick piece of sanded plywood. I personally love the butcher block because it feels sturdy and handles the weight of a heavy monitor without breaking a sweat.
- 2. Next, you need legs, and this is where you can really save some serious cash. You can go the classic route with four wooden furniture legs, but if you’re like me and value a bit of versatility, pick up some heavy-duty metal hairpin legs online. They are incredibly easy to screw in, and they give the desk a bit of breathing room so your small apartment doesn’t feel cluttered and heavy.
- 3. Before you start driving any screws, lay your desktop face-down on a rug or a piece of cardboard to prevent scratching. This is the part where I usually grab my multi-tool to double-check my measurements before I commit. Mark exactly where your legs will sit, making sure you leave enough space from the edges so the desk doesn’t feel unbalanced or tippy.
- 4. Now, it’s time for the actual assembly. Use a drill to pre-drill small pilot holes where your legs will go; if you skip this, you risk the wood splitting wide open, which is a total nightmare. Once those holes are ready, align your legs with your marks and drive the screws in steadily. Just don’t over-tighten them right away—give yourself a little wiggle room until everything is aligned.
- 5. Once the legs are secure, give the whole thing a good shake to make sure nothing is wobbling. If it feels a bit unsteady, you might need to add some felt pads to the bottom of the legs or slightly adjust your screw placement. I always keep a few extra pads in my drawer because, let’s be real, floors are rarely perfectly level.
- 6. The final step is the part that actually makes it feel like yours: the finish. You don’t need a professional lacquer job; a simple wipe-down with a natural wood oil or a matte sealant will protect the surface from coffee rings and scratches. It’s not about making it look like a museum piece, it’s about making sure it’s ready to work.
Choosing the Best Wood for Office Desks Without Overspending
Look, I know the temptation to head straight for the expensive walnut or oak slabs when you’re browsing for custom desk design ideas, but your bank account (and your sanity) will thank you for staying grounded. If you aren’t trying to build a museum piece, you don’t need luxury hardwoods. For most of us working from small apartments, pine or even high-quality birch plywood are the absolute best wood for office desks because they are forgiving, affordable, and easy to work with. Pine is great if you want that rustic look, but just be prepared to sand it a little more to get it smooth.
If you’re leaning toward a more minimalist desk construction, I actually swear by using a thick birch plywood sheet. It’s incredibly sturdy, doesn’t warp as easily as some cheap softwoods, and gives you a clean, modern edge if you sand it down properly. You don’t need a garage full of professional-grade equipment to make this happen; honestly, a few basic woodworking tools for beginners and a bit of patience are all you really need to turn a budget-friendly slab into a workspace that actually holds up to your daily grind.
Minimalist Desk Construction Essential Woodworking Tools for Beginners
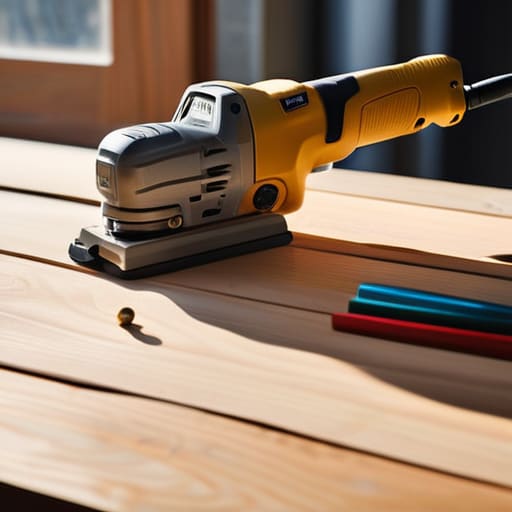
Look, I know the first time you walk into a hardware store, it feels like you’re being interrogated by a wall of expensive, shiny machinery. You don’t need a workshop that looks like a professional carpenter’s studio to pull this off. For a successful minimalist desk construction, you really only need a few reliable basics: a cordless drill, a circular saw (or even better, ask the store to make the cuts for you!), a level, and some quality sandpaper. I used to think I needed every gadget under the sun, but honestly, having a few high-quality essentials is much better than owning twenty mediocre tools that just sit in your closet gathering dust.
If you’re nervous about the technical side, don’t be. When gathering your woodworking tools for beginners, focus on things that prioritize accuracy over complexity. A simple speed square and a measuring tape will do more for your sanity than a fancy laser level ever could. My biggest tip? Invest a little extra in a decent drill bit set. There is nothing more frustrating than a stripped screw halfway through your DIY desk workspace setup, and a good bit makes the whole process feel much more seamless and much less like a chore.
Five Things I Wish I Knew Before I Picked Up a Drill
- Don’t obsess over perfection; if your tabletop has a tiny knot or a slight grain irregularity, just sand it down and call it character. Real life isn’t a showroom, and a desk that’s 95% perfect but actually sturdy is better than a flawless one that wobbles every time you type.
- Measure twice, but honestly, measure three times. I’ve learned the hard way that even a quarter-inch mistake can make your legs feel lopsided, and nothing ruins my workflow like a desk that rocks back and forth while I’m on a Zoom call.
- Invest in decent sandpaper instead of the cheapest pack you can find. It sounds like a small thing, but if you skip the grits and try to jump straight to the smooth stuff, you’ll end up with a surface that feels like sandpaper—literally—and that’s a nightmare for your wrists.
- Think about your cable management before you even screw the legs on. I used to hate my cluttered desk until I started drilling a few simple holes or attaching a cheap tray underneath; it’s a total game-changer for keeping my brain from feeling fried by visual noise.
- Test the height before you commit to the final build. We all have different sitting postures, and I’ve seen too many people build a beautiful piece only to realize they’re hunching over like a gargoyle because they didn’t account for their chair height.
The Bottom Line: Build for Use, Not for Show
Don’t get paralyzed by the “perfect” wood choice; as long as it’s sturdy and level, you can always sand and stain it later to fit your vibe.
Invest in a few solid, multi-use tools rather than a massive kit—if you can’t use it for more than one project, you probably don’t need it yet.
Prioritize a stable surface over a fancy design, because a desk that wobbles every time you type is going to drive you crazy no matter how good it looks.
## A Note on Getting Started
“Your first desk doesn’t need to be a museum piece or a masterpiece of fine joinery; it just needs to be a sturdy, reliable place where you can actually get your work done without the legs wobbling every time you reach for your coffee.”
Maya Sterling
The Finish Line (And Your New Workspace)
At the end of the day, building this desk isn’t about achieving some museum-quality masterpiece; it’s about creating a space that supports your actual life. We’ve covered how to pick budget-friendly wood that won’t break the bank, the essential tools you actually need (and the ones you can totally skip), and a construction method that prioritizes function over fluff. You don’t need a professional workshop or a degree in carpentry to get this done. As long as your surfaces are level and your joints are steady, you have successfully built a functional foundation for your daily grind.
I know that staring at a pile of raw lumber can feel a little intimidating, especially if you aren’t used to getting your hands dirty. But I promise, once you set your laptop down on a surface you built with your own two hands, that sense of accomplishment is worth every splinter. Don’t worry if there are a few visible nail heads or if the stain isn’t perfectly even—those little imperfections are just proof that this piece belongs to you. Stop waiting for the “perfect” time to start your DIY journey and just get to work. Your future, more organized self will thank you.
Frequently Asked Questions
How do I make sure my desk doesn't wobble once I've actually put my computer and monitors on it?
There is nothing more frustrating than a monitor that shakes every time you type. First, check your floor—if you’re on carpet, those tiny leveling feet won’t do much. I usually grab some felt pads or even a bit of scrap wood to shim under the uneven leg. If the wobble is coming from the frame itself, tighten every single bolt. If it’s still shaky, adding a simple cross-brace under the desktop usually does the trick.
Is it worth spending the extra money on a professional finish, or can I just use something simple like wax or oil to keep it low-maintenance?
Honestly? Unless you’re planning to host formal dinners on this desk, skip the professional lacquer. It’s expensive and feels way too precious to touch. I’m a big fan of using a simple hardwax oil or even just a good quality butcher block oil. It’s much more forgiving; if you get a scratch or a water ring, you can just spot-treat it without a full sanding nightmare. Keep it simple and lived-in.
I'm working with a really small apartment space—are there any easy ways to add cable management so my cords aren't a total mess on the floor?
Living in a small apartment means every square inch counts, and those “cord nests” on the floor make a tiny space feel even more cluttered. I swear by heavy-duty command hooks or even just simple Velcro ties to run cables along the underside of your desk legs. If you can, grab a cheap cable management tray that screws into the back; it keeps everything off the floor and out of sight, making your workspace feel instantly calmer.
