
I was sitting on my kitchen floor last Tuesday, surrounded by a sticky, translucent puddle that used to be a “beginner-friendly” coaster kit, wondering why everything I tried looked more like a science experiment gone wrong than a piece of art. If you’ve ever scrolled through social media and felt like you need a professional studio and a thousand dollars in specialized molds just to get started, I have a secret for you: you don’t. Most of the tutorials for resin crafts for beginners make it look like magic, but in reality, it’s just a series of small, manageable steps that anyone can master with a little bit of patience and the right basic setup.
I’m not here to sell you on a lifestyle of perfect, crystal-clear masterpieces that look like they belong in a high-end boutique. Instead, I want to show you how to navigate the messy middle ground where the real learning happens. In this guide, I’m breaking down the absolute essentials you actually need to buy—and more importantly, the stuff you can totally skip—so you can start creating without blowing your monthly budget. We’re going to focus on functional, fun projects that work, even if your first few attempts aren’t exactly Instagram-ready.
Table of Contents
- Step-by-Step Instructions
- The Bare Essentials Resin Art Supplies for Beginners Without the Fluff
- Mastering Resin Mixing Ratios Explained to Stop Wasting Expensive Liquid
- Five Things I Wish I Knew Before I Ruined My First Batch
- The TL;DR: What I Actually Want You to Remember
- Forget the Pinterest Perfection
- Real Talk: Your First Resin Project
- Frequently Asked Questions
Guide Overview
Tools & Supplies
- Silicone molds for shaping the resin
- Mixing cups for combining components
- Wooden sticks for stirring
- Heat gun or lighter to remove bubbles
- Safety gloves to protect skin
- Epoxy resin kit (2-part resin and hardener)
- Silicone molds (various shapes)
- Liquid pigments or mica powder for color
- Glitter or dried flowers for decoration
- Sandpaper for smoothing edges
Step-by-Step Instructions
- 1. First things first, you need to set up a workspace that won’t make you regret your life choices later. Find a flat surface—ideally a table you don’t care about too much—and cover it with a silicone mat or even just some cheap parchment paper. You really want to avoid working near any open windows or fans because even a tiny breeze can blow dust into your wet resin, and trust me, nothing kills the vibe faster than a tiny piece of lint trapped in your beautiful creation.
- 2. Once your space is prepped, it’s time to gear up. Don’t skip the safety stuff just because you’re only making a keychain; grab a pair of nitrile gloves and make sure the room is well-ventilated. I personally keep a small fan running in the corner of my room to keep the air moving, which helps with the fumes and keeps things feeling a bit more breathable while you work.
- 3. Now, let’s talk about the actual mixing, which is where most people trip up. Most beginner kits use a 1:1 ratio, but you need to be deadly accurate with your measurements. I highly recommend using a digital kitchen scale instead of those little plastic measuring cups. It’s much more precise, and since resin is a chemical reaction, being off by even a tiny bit can leave your project feeling tacky or “sticky” even after days of waiting.
- 4. After you’ve measured everything out, start stirring slowly. This part requires a little bit of patience, but try to avoid whipping air bubbles into the mix like you’re making a meringue. I usually stir in a slow, figure-eight motion for a couple of minutes until the liquid looks completely clear and loses that cloudy, streaky appearance. If you see bubbles forming on the surface, you can lightly pass a butane lighter or a heat gun over them to pop them instantly.
- 5. This is the fun part where you actually get to play with colors or glitter. If you’re using mica powders or alcohol inks, start with very small amounts. It is incredibly easy to overdo it and end up with a blob of solid color that looks more like a melted crayon than a piece of art. I like to add my pigment bit by bit, stirring gently until I hit the shade I’m aiming for.
- 6. Pour your mixture into your molds, but don’t just dump it in all at once. Try to pour in a thin, steady stream to minimize the air you’re trapping inside. Once the mold is full, give it a tiny tap on the table to help those stubborn bubbles rise to the top. Then, the hardest part of the whole process begins: leaving it alone. Cover your workspace with a cardboard box so nothing falls into it, and walk away for at least 24 hours.
- 7. Finally, once the resin feels hard and isn’t moving at all, pop it out of the mold. If the edges feel a little sharp or uneven, don’t panic. You can grab a piece of fine-grit sandpaper and gently smooth out the rough spots. It won’t look like a factory-made masterpiece right away, but it’ll be your creation, and that’s exactly how it should be.
The Bare Essentials Resin Art Supplies for Beginners Without the Fluff
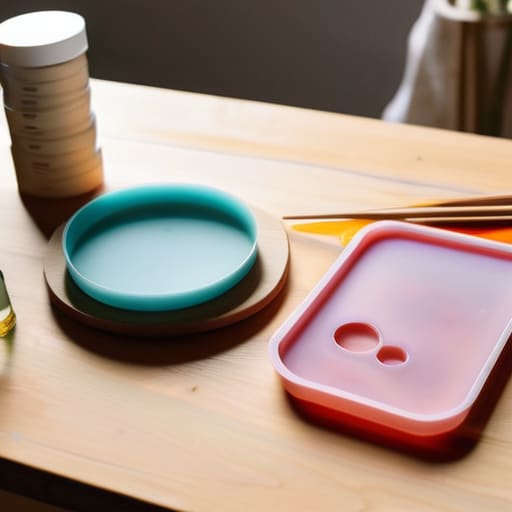
Look, I know the temptation to go to a craft store and grab every shiny glitter jar and specialized tool on the shelf, but please—save your money. When you’re just starting out, you really only need the basics to see if this hobby actually sticks. My biggest piece of advice? Focus on your resin art supplies for beginners that serve multiple purposes. You need a decent set of silicone molds (start with simple coasters or jewelry shapes), some mixing cups, and wooden stir sticks. Don’t go hunting for the most expensive silicone molds for starters right away; just get a few versatile ones so you can practice your technique without feeling like you’re wasting precious material if a pour goes sideways.
The one area where I refuse to cut corners is safety. This isn’t just “crafting”; it’s chemistry. Please, do not skip the safety precautions for epoxy resin, like wearing nitrile gloves and working in a room with plenty of airflow. It’s not about being dramatic; it’s about not breathing in fumes that will make you feel terrible later. Once you’ve got your safety gear sorted, you can start playing with different resin pigment and colorant types to find what you love.
Mastering Resin Mixing Ratios Explained to Stop Wasting Expensive Liquid

Look, I’ve definitely been there: standing in my kitchen, staring at a sticky, half-cured mess because I thought I could “eyeball” the measurements. Please, learn from my expensive mistake and don’t do that. When it comes to resin mixing ratios explained, it is not a suggestion—it is a law. Whether your specific brand calls for a 1:1 ratio or a 2:1 ratio by volume or weight, you have to be precise. If you’re off by even a tiny bit, your project will stay tacky forever, and you’ll end up throwing that entire batch of resin art supplies for beginners straight into the trash.
I highly recommend investing in a cheap digital scale if your resin is weight-based. It’s much more accurate than those plastic measuring cups, which can be tricky if you aren’t filling them to the absolute brim. Also, keep in mind that once you start mixing, the clock is ticking. I like to prep everything beforehand—my pigments, my molds, and my stir sticks—so I’m not racing against a hardening chemical while trying to find a spoon. Taking those extra two minutes to prep will save you a massive headache (and a lot of money) later.
Five Things I Wish I Knew Before I Ruined My First Batch
- Forget the fancy molds for a second and just practice on something cheap. I wasted way too much resin trying to make perfect jewelry right out of the gate when I should have just been practicing my pour technique on silicone coasters or even old plastic lids.
- Seriously, invest in a decent respirator mask. I know, it’s not exactly “aesthetic” to wear a heavy-duty mask in your kitchen, but breathing in those fumes is not worth it, and once you start getting headaches, you’ll realize I’m right.
- Don’t try to be a hero with your workspace. Resin is incredibly messy and it will find a way to stick to your table, your floor, or your favorite mug. Cover everything in cheap plastic sheeting or even old newspapers—just make it easy to toss when you’re done.
- Temperature is everything, so stop fighting the weather. If your apartment is freezing, your resin is going to be a cloudy, bubbly nightmare; try to work in a room that’s warm and steady so the chemicals actually behave themselves.
- Give it more time than you think it needs. I used to think that because the resin felt hard to the touch, I could start demolding, only to have my project end up a sticky, sad mess. If the instructions say 24 hours, give it 30. Trust the process, not your impatience.
The TL;DR: What I Actually Want You to Remember
Don’t go overboard on the fancy molds and glitter right away; focus on getting your mixing ratios right first so you aren’t literally pouring money down the drain.
Perfection is a trap—your first few pieces might have bubbles or slightly wonky edges, and that’s totally fine as long as they’re functional.
Safety isn’t optional, even if you’re just doing a small project in your kitchen; grab a mask and some gloves because your lungs will thank me later.
Forget the Pinterest Perfection
“Don’t let the fear of a sticky mess or a wonky bubble stop you from starting; your first few pieces might not be Instagram-ready, but they’ll be the most important ones because they’re the ones that actually taught you how the medium works.”
Maya Sterling
Real Talk: Your First Resin Project
Look, if you’ve followed along this far, you already know that resin isn’t about having a studio that looks like a professional workshop. We’ve covered the basics: grabbing the right supplies without overspending, mastering those tricky mixing ratios so you aren’t literally throwing money in the trash, and following a solid process. The most important thing to remember is that mistakes are part of the chemistry. You might end up with a few bubbles or a piece that stays tacky longer than expected, but that’s just how you learn the rhythm of the material. As long as you have your safety gear and a basic understanding of your ratios, you are already ahead of most people.
At the end of the day, don’t let the fear of a “failed” project keep you from actually starting. I’ve ruined plenty of coasters and keychains in my own kitchen, and honestly? I still love them because they taught me something. Resin can feel intimidating because it’s permanent and a little bit messy, but perfection is overrated. Just grab your gear, clear off a spot on your table, and see what happens. You don’t need to be an artist to make something functional and cool for your own home. Just dive in and start making.
Frequently Asked Questions
Is it actually safe to do resin art in my small apartment, or do I need a dedicated studio space?
Honestly, I’ve done plenty of resin work right at my kitchen table, so you don’t need a studio. But, since I live in a small apartment too, you can’t just wing it. You absolutely need a well-ventilated area—open a window and get a small fan going. Most importantly, invest in a decent respirator mask. Don’t rely on a paper mask; those fumes are no joke when you’re working in tight quarters.
How do I deal with those annoying little bubbles that always seem to ruin my pieces?
Ugh, the bubble struggle is so real. I used to think I was doing something wrong, but honestly, it’s usually just physics. First, try letting your mixed resin sit for a few minutes before pouring—it gives those tiny bubbles a chance to rise to the top. If they’re still being stubborn, a quick pass with a heat gun or even a lighter works wonders. Just don’t overdo it, or you’ll scorch the resin!
What happens if I mess up a mix—is there any way to salvage the resin, or is it just a total loss?
Honestly, it’s a sinking feeling when you see that resin getting tacky or staying gooey, but don’t toss it just yet. If it’s just a little bit sticky, you might be able to save it by adding a tiny bit of fresh hardener and mixing it in—but it’s a gamble. My best advice? If it’s a total disaster, use it for a “practice pour” to test colors or bubbles. It’s not a waste if it teaches you something.
