
If you’ve ever spent three hours scrolling through TikTok only to find someone claiming you need a $200 proofing basket and a specialized stone just to figure out how to bake bread at home, please, let’s just stop right there. I used to think that if my kitchen didn’t look like a professional boulangerie, I was somehow failing at the “art” of baking. Between the expensive specialty flours and the intimidating sourdough starters that seem to have more personality and demands than my actual roommates, the whole process has been turned into this performative, high-stakes ritual that honestly feels completely unnecessary.
I’m not here to sell you on a lifestyle you can’t afford or a recipe that requires a PhD in fermentation. Instead, I want to show you how to make a decent, warm loaf using the stuff you likely already have in your pantry and a few basic tools. We are going to focus on functional results—bread that actually tastes good and fills you up—without the mountain of dishes or the stress of perfection. This is about making life a little easier, one crusty slice at a time.
Table of Contents
Bread Making for Beginners Skip the Expensive Gear
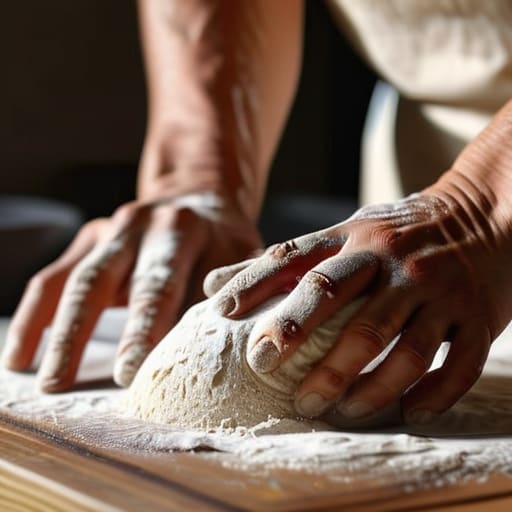
Look, I know the internet makes it seem like you need a $500 stand mixer and a professional-grade stone oven just to get a decent crust. Honestly? That’s a lie. When I first started getting into bread making for beginners, I felt so intimidated by all the specialized gadgets on those lifestyle blogs. But here’s a secret: your hands are actually your best asset. You don’t need a fancy machine to master basic kneading dough techniques; you just need a clean counter and a little bit of patience.
Instead of blowing your budget on high-end equipment, focus on the essential baking tools that actually move the needle. A heavy Dutch oven (or even just a sturdy pot with a lid) can mimic that professional steam effect, and a simple digital scale is worth its weight in gold for accuracy. Everything else? You probably already have it in your kitchen cabinets. We aren’t trying to win a televised baking competition; we’re just trying to make something warm and delicious that doesn’t break the bank.
The Real Yeast Fermentation Process Without the Drama
Look, I know the term “yeast fermentation process” sounds like something straight out of a biology textbook, but let’s strip away the intimidation factor. At its core, you’re just giving tiny, living organisms a snack so they can do the heavy lifting for you. You don’t need a temperature-controlled lab or a degree in microbiology; you just need a warm corner of your kitchen and a little bit of patience. If your dough isn’t doubling in size, don’t panic and don’t throw the whole batch out. It’s likely just being stubborn because your apartment is a little chilly.
The biggest mistake I see people make when starting bread making for beginners is trying to rush this stage. We live in a world of instant gratification, but yeast works on its own timeline. If you try to force it by cranking up the heat, you’ll just end up with a weirdly sour, over-proofed mess. Instead, think of it as passive time management. Set a timer, go fold some laundry or tend to your herbs, and let the science happen in the background. It’s one of those rare moments where doing absolutely nothing is actually the most productive thing you can do.
5 ways to keep your bread from becoming a total disaster
- Stop obsessing over the scale. If you don’t have a digital kitchen scale, just use your measuring cups, but please, for the love of all things holy, level them off with a knife. Too much flour is the number one reason homemade bread turns into a literal brick.
- Learn to trust your hands, not the timer. Every kitchen has a different humidity level and every bag of flour behaves differently. If the recipe says “knead for ten minutes” but your dough feels smooth and bouncy after five, stop. Don’t overwork it just because a clock told you to.
- Embrace the “ugly” rise. Your dough isn’t going to look like those perfectly sculpted boules you see on Instagram. If it looks a little lumpy or sits a bit low in the bowl, don’t panic. As long as it’s actually growing, you’re doing fine.
- Temperature is your secret ingredient. If your kitchen is freezing, your bread is going to take forever to rise. Don’t be afraid to tuck your dough into the oven (turned OFF, obviously) with the light on. That little bit of warmth is a game changer when you’re in a rush.
- Let it cool before you touch it. I know, the smell is incredible and you want to tear into it immediately, but cutting into hot bread releases all the steam that’s supposed to keep the inside soft. Wait at least twenty minutes, or you’ll end up with a gummy, sad texture.
The "No-Stress" Bread Cheat Sheet
Stop hunting for specialized tools; a heavy bowl, a kitchen scale, and a regular oven are all you actually need to get a decent crust.
Forget the rigid, minute-by-minute schedules; yeast works on its own timeline, so just watch how the dough looks and feels rather than staring at the clock.
Aim for “good enough” instead of perfect; a slightly lopsided loaf that tastes amazing is a much bigger win than a pretty loaf that took you three days of stress to make.
## My philosophy on the perfect loaf
“Stop waiting for the perfect kitchen setup or a starter that looks like a science experiment; a warm loaf of bread is really just flour, water, and the willingness to get your hands a little messy.”
Maya Sterling
The Messy, Delicious Reality
At the end of the day, if your kitchen looks like a flour bomb went off or your loaf comes out looking more like a hockey puck than a golden masterpiece, you’re doing it right. We’ve covered the essentials: you don’t need a $500 Dutch oven or a degree in microbiology to make something edible. Just remember that it’s really just about simple ingredients, patience, and a little bit of grit. Once you stop obsessing over the perfect crumb structure and start focusing on the fact that you actually made something from scratch with your own two hands, the whole process becomes a lot less intimidating and a lot more rewarding.
My biggest piece of advice? Don’t let the fear of a “failed” loaf keep you from even trying. Some days the bread will be perfect, and other days it’ll be a dense, slightly burnt brick—and honestly, even the “failed” ones make excellent French toast the next morning. Life is too short to wait for perfection before you start enjoying the process. So, grab your flour, find a bowl, and just start making a mess. You’ll be surprised at how much better a warm slice of homemade bread tastes when you aren’t worried about how it looks on a grid.
Frequently Asked Questions
My kitchen is freezing right now—how am I supposed to get the dough to rise without a fancy proofing box?
Honestly, a freezing kitchen is the ultimate test, but you don’t need a fancy proofing box to fix it. I usually just use my oven—turned off, obviously—with nothing but the oven light on. That tiny bit of warmth from the bulb creates a little microclimate that’s perfect. If that’s still too chilly, tuck your bowl inside a turned-off slow cooker or even a cozy pile of freshly laundered towels. Keep it simple.
Is there a way to tell if my yeast is actually alive before I waste a whole bag of flour on a failed batch?
Oh, I have been there. There is nothing more heartbreaking than realizing you’ve wasted half a bag of flour on a dough that just… sits there. Before you commit, do a quick “proof” test. Mix your yeast with warm water (not hot!) and a pinch of sugar. If it’s alive, it’ll get all bubbly and foamy within ten minutes. If it just looks like cloudy water? Toss it. It’s not worth the frustration.
I don't have a Dutch oven; can I actually get a decent crust using just a regular baking sheet?
Honestly? Yes, you absolutely can. I used to think a Dutch oven was non-negotiable for that crackly crust, but it’s really just about trapping steam. Since a baking sheet doesn’t do that, here’s my hack: toss a shallow pan of boiling water on the rack right below your bread. That burst of steam mimics the Dutch oven effect, giving you a decent crust without needing to drop a hundred bucks on heavy cast iron.
