

I was standing in my living room last Tuesday, staring at a pile of expensive, floor-length linen scraps I’d bought on a whim, feeling absolutely defeated because I couldn’t find a single sewing machine in my apartment that didn’t feel like a daunting industrial beast. We’ve been sold this idea that diy curtains have to be these perfectly tailored, Pinterest-worthy masterpieces that require a degree in textile engineering to pull off. But honestly? I realized that if I just wanted to block out the morning sun so I could actually drink my coffee in peace, I didn’t need a sewing studio; I just needed a functional solution that didn’t break my bank account.
In this guide, I’m stripping away all the performative perfection and showing you how to actually get your windows covered without the stress. We aren’t going to obsess over invisible hems or expensive hardware; instead, I’ll walk you through a few no-sew and low-effort methods that work for real life. Whether you’re working with scrap fabric, thrifted finds, or just want to hang something up quickly to make a rental feel like home, I’ve got you covered with tested, messy, and budget-friendly ways to make it happen.
Table of Contents
- Step-by-Step Instructions
- Smart Fabric Selection for Window Treatments That Wont Break the Bank
- Measuring Windows for Curtains Without the Overwhelming Stress
- 5 Little Hacks to Keep Your DIY Curtains from Looking Like a High School Art Project
- The Bottom Line: Keeping It Simple and Functional
- ## The Real Goal of DIY
- Done is Better Than Perfect
- Frequently Asked Questions
Guide Overview
Tools & Supplies
- Sewing machine for stitching hems and edges
- Fabric scissors for clean straight cuts
- Measuring tape for accurate window dimensions
- Pins or clips to hold fabric in place
- Iron and ironing board to press seams flat
- Fabric (2-3 yards depending on window size)
- Thread (1 spool matching fabric color)
- Curtain tape or header material (1 roll)
- Measuring tape (1 unit)
Step-by-Step Instructions
- 1. First things first, you need to grab your fabric. Don’t feel like you have to hunt down some expensive, high-end linen that’s going to cost you half your grocery budget. Honestly, I usually just head to a thrift store or look for heavy cotton remnants at the craft shop. The goal here is weight; you want something that actually hangs straight and won’t blow around like a piece of tissue paper every time someone opens a window.
- 2. Once you have your fabric, it’s time to measure—but don’t get paralyzed by the math. Measure your window width and then add at least six inches to each side so the curtains actually cover the frame. For the length, decide if you want them to just barely skim the floor or puddle a bit. I personally prefer them to sit about a half-inch above the floor because, let’s be real, vacuuming around fabric piles is a chore I’d rather avoid.
- 3. Now, let’s talk about the edges. If you aren’t someone who finds sewing to be a relaxing hobby (and trust me, I am not), don’t sweat the traditional hem. You can use iron-on hem tape to create clean edges in about ten minutes without ever touching a needle. It’s a total lifesaver when you just want the finished look without the unnecessary stress of a sewing machine mishap.
- 4. Next, you need to decide how these are actually going to hang. If you already have a curtain rod, you can just fold the top of your fabric over to create a “pocket” for the rod to slide through. This is what I call the low-effort win. If you don’t want to deal with rods, just grab some cheap clip-on rings from the hardware store. It takes two seconds and looks surprisingly intentional.
- 5. Before you commit to the final look, do a “test hang.” Use some painter’s tape or even just some heavy clips to hold the fabric up against the window. This is your chance to see if the scale of the pattern feels too overwhelming or if the fabric is too sheer. It’s much easier to adjust a piece of tape now than it is to realize you’ve made a mistake after you’ve already spent an hour working on it.
- 6. Finally, get them up there. If you’re working solo, this is where that multi-tool in my purse comes in handy for tightening a loose screw on a bracket or snipping a stray thread. Once they’re up, give them a good shake and a steam (or a quick spray with water and a light iron) to get those annoying fold lines out. There—you’ve got curtains that look great and, more importantly, didn’t break the bank.
Smart Fabric Selection for Window Treatments That Wont Break the Bank
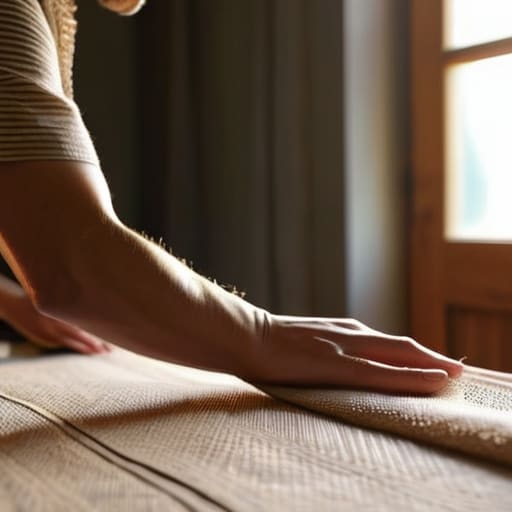
Look, I know the temptation to head straight for the high-end boutique section is real, but let’s be honest: most of us aren’t trying to recreate a showroom. When it comes to fabric selection for window treatments, my best advice is to prioritize weight and light control over a fancy label. If you’re trying to darken a bedroom, don’t waste your time with thin, wispy cottons; look for heavier canvases or even repurposed upholstery scraps. I’ve found that a thick, textured fabric does a much better job of hiding any less-than-perfect sewing than something sheer and unforgiving.
If you’re really trying to keep the budget tight, don’t overlook the thrift store or the “remnant” bin at your local craft shop. You can often find incredible pieces of linen or velvet that would cost a fortune if bought by the yard. Just make sure you’re measuring windows for curtains accurately before you commit to a piece, because you don’t want to realize halfway through that your “bargain” fabric is two inches too short. It’s not about being perfect; it’s about finding something that feels good and actually does the job.
Measuring Windows for Curtains Without the Overwhelming Stress
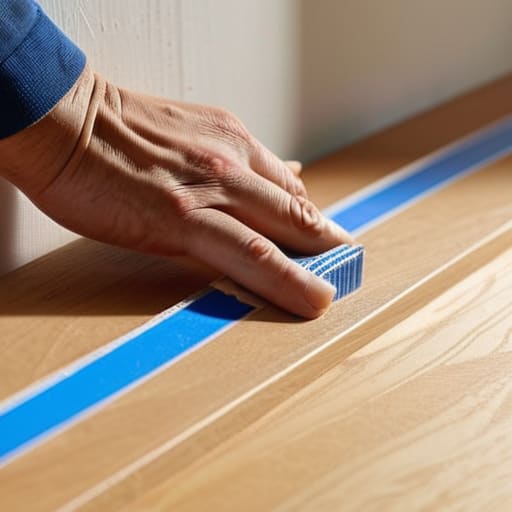
I know, I know—pulling out a metal tape measure feels like the first step toward a headache. But here’s the thing: if you mess up the measuring windows for curtains part, you’re going to end up with panels that look like they’re floating or, even worse, barely skimming the floor. My advice? Don’t try to eyeball it. Grab a piece of painter’s tape and mark your “ideal” height on the wall first. It gives you a visual reference so you aren’t constantly second-guessing if you’ve gone too low or too high.
When you’re measuring the width, aim for double the width of your window. If you only buy enough fabric to cover the glass, your windows will look tiny and cramped once they’re actually up. I also like to measure where the rod will actually sit, not just the window frame itself. This little trick ensures you have enough breathing room on the sides to let in light when the curtains are open. Just take a breath, grab a notepad, and measure twice so you only have to cut once.
5 Little Hacks to Keep Your DIY Curtains from Looking Like a High School Art Project
- Don’t obsess over the perfect hem; if you aren’t a sewing pro, just use heavy-duty hem tape. It’s way faster, and honestly, once they’re hanging, nobody is going to inspect your stitching.
- If your fabric feels a little too thin or “cheap,” double it up. Using two layers of a budget-friendly material makes the curtains hang with a much more expensive, weighted look.
- Grab some iron-on interfacing if you’re working with flimsy fabrics. It adds just enough structure so your curtains don’t look limp and sad after the first time you wash them.
- Use a tension rod if you’re renting or just don’t want to commit to drilling holes in your walls. It’s a lifesaver for quick fixes, and it works surprisingly well with heavier fabrics if you get a sturdy one.
- Always steam them once they’re up. Even if you did the best job possible, wrinkles are the enemy of looking “put together,” and a quick pass with a steamer makes even the messiest DIY look intentional.
The Bottom Line: Keeping It Simple and Functional
Forget the “perfect” aesthetic; focus on finding heavy, functional fabric that actually does its job, whether that’s blocking light or adding a bit of privacy.
Don’t let the measuring part paralyze you—as long as you’re accurate within an inch or two, your curtains will look great and work exactly how you need them to.
The goal here is to save money and reduce stress, so if a DIY method feels too complicated or expensive, pivot to a simpler version that actually fits your budget and your life.
## The Real Goal of DIY
“Forget about making your windows look like a Pinterest board; the real win is hanging something functional that actually makes your space feel like home without draining your savings account.”
Maya Sterling
Done is Better Than Perfect
At the end of the day, making your own curtains doesn’t require a degree in interior design or a massive budget. We’ve covered how to pick fabrics that actually serve a purpose—whether that’s blocking out the morning sun or just adding a bit of texture—and how to get those measurements right without spiraling into a measuring-tape-induced meltdown. Remember, the goal isn’t to create a showroom-ready masterpiece that looks like it belongs in a magazine; the goal is to stop overspending on decor and finally get those windows covered with something that feels like yours.
If your hem is a little crooked or the fabric bunches more than you expected, please don’t let that stop you. I’ve had plenty of my own DIY projects that looked a little “lived-in,” and honestly? They work just as well. The real win here is the satisfaction of looking at your window and knowing you tackled it yourself. Life is too short to wait for the “perfect” moment or the perfect setup to make your space feel like home. Just grab your tools, embrace the mess, and get it done. You’ve totally got this.
Frequently Asked Questions
I'm worried about the weight—will my DIY curtains be too heavy for a standard tension rod to hold up?
Honestly, that’s a valid worry. I’ve definitely had a tension rod come crashing down mid-afternoon before. If you’re using something heavy like velvet or thick canvas, skip the tension rod—it’s just going to give up on you. Stick to a standard screw-in bracket for anything substantial. But if you’re using lightweight linen or cotton, a tension rod is totally fine. Just don’t overstuff the rod with too much fabric!
How do I stop the edges from fraying if I'm not actually using a sewing machine?
Honestly, if you aren’t into sewing, don’t even sweat it. I used to think I needed a machine for everything, but honestly? A bottle of fray check or even some simple fabric glue works wonders. If you want something a bit more “set it and forget it,” just grab some iron-on hem tape. You just fold the edge over, press it with your iron, and you’re done. It’s fast, cheap, and actually stays put.
Is there a way to make these look a little less "homemade" so they don't look out of place in my living room?
I totally get it. That “craft project” look can be a real vibe-killer in a living room. My secret? Focus on the hardware and the hang. Skip the flimsy tension rods and invest in a solid, weighted curtain rod—it makes everything look intentional. Also, don’t skimp on the length; let the fabric hit the floor rather than hovering an inch above it. It adds weight and that “expensive” drape we’re all chasing.
