
I was staring at a pile of expensive, particle-board flat-pack boxes in my living room, wondering why I’d spent eighty dollars on something that felt like it might collapse if I breathed on it too hard. We’ve been sold this lie that you either need a massive workshop and professional-grade tools or you have to settle for flimsy, “aesthetic” furniture that falls apart in six months. But here’s the truth: learning how to build a bookshelf isn’t about having a master carpenter’s toolkit; it’s about understanding a few basic mechanics so you can create something that actually lasts.
In this guide, I’m stripping away the intimidating jargon and the need for a perfect garage setup. I’m going to walk you through a realistic, budget-friendly method to build a sturdy unit using simple materials you can grab from any local hardware store. We aren’t chasing a Pinterest-perfect finish here; we are focusing on functional, solid construction that will hold your heavy hardcovers without bowing. If you’re ready to stop buying disposable furniture and start building things that actually work, let’s get to it.
Table of Contents
- Step-by-Step Instructions
- Ditch the Fancy Gear Essential Woodworking Tools for Beginners
- Measuring and Cutting Wood Without Losing Your Mind
- 5 Real-World Lessons I Learned the Hard Way
- The Bottom Line: Keep It Functional, Not Fancy
- ## The Real Goal
- The Finish Line (And What Comes Next)
- Frequently Asked Questions
Guide Overview
Tools & Supplies
- Circular saw or hand saw for cutting wood to size
- Power drill for driving screws
- Measuring tape for accurate layout
- Sandpaper for smoothing edges
- 3/4 inch plywood or pine boards (approx. 2-3 sheets)
- Wood screws (1.5 inch or 2 inch)
- Wood glue for extra stability
- Wood stain or paint for finishing
Step-by-Step Instructions
- 1. First things first, we need to get our supplies together without spending a fortune at a high-end design boutique. Grab some standard 3/4-inch plywood or even some sturdy pine boards from your local hardware store—honestly, don’t stress about finding exotic wood that looks like it belongs in a museum. You’ll also need a drill, some wood screws, wood glue, a measuring tape, and my absolute lifesaver: that little multi-tool I always have on me to open stubborn packaging.
- 2. Once you have your materials, it’s time to measure and cut. If you don’t own a power saw (and let’s be real, most of us don’t), don’t sweat it; just have the hardware store employees cut your boards to size while you’re there. I usually aim for a simple rectangular frame with a few internal shelves, but keep the dimensions practical for the actual books you own, rather than some theoretical library dream.
- 3. Now, let’s get to the assembly. Apply a thin bead of wood glue along the edges where the boards meet—this is the secret to making sure your shelf doesn’t wobble after a week. Line up your sides and your top/bottom pieces, and then drive your screws in. If you’re worried about the wood splitting, always drill pilot holes first; it’s a tiny extra step that saves you a massive headache later.
- 4. While the glue is drying, we need to tackle the backing. A lot of people skip this because it feels “un-aesthetic,” but a thin sheet of hardboard or even heavy cardboard tacked to the back is what actually keeps the whole thing from leaning to one side. It’s the difference between a shelf that stands straight and one that eventually collapses into a pile of lumber.
- 5. Next, you’ll want to install your adjustable shelves. I highly recommend buying a cheap set of shelf pin jig or just measuring carefully to drill small holes along the inside of your side panels. This way, if you suddenly buy a massive hardcover cookbook or a tall vase, you can actually move the shelves to fit your life instead of being stuck with one rigid layout.
- 6. Finally, it’s time for the finishing touches, and this is where we embrace the “functional over perfect” rule. You can sand the edges down so they aren’t scratchy, and if you want to paint it, go for it—but don’t feel like you need a professional-grade lacquer. A simple wipe-down or a quick coat of matte paint is plenty to make it look intentional and clean without looking like you’re trying too hard.
Ditch the Fancy Gear Essential Woodworking Tools for Beginners
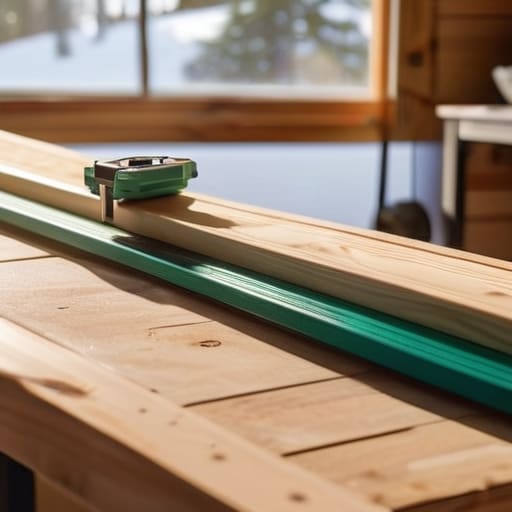
Look, I know the temptation to head straight to the big-box hardware store and buy every shiny power tool in the aisle, but please—save your money. You don’t need a professional workshop to get this done. When I first started tinkering around my apartment, I realized that the most important woodworking tools for beginners aren’t the most expensive ones; they’re the ones you actually know how to use. A solid tape measure, a level, a cordless drill, and a basic circular saw are really all you need to get started. If you can master the art of measuring and cutting wood accurately, you’re already halfway there.
The real secret to a project that doesn’t feel like a disaster is focusing on precision rather than gear. Instead of hunting for complex custom shelving unit plans, just focus on the basics of stability. A slightly wonky shelf is a headache waiting to happen, so invest a little extra time in ensuring your joints are tight. It’s much better to spend an extra twenty minutes double-checking your marks than to realize you’ve wasted a whole board because of a minor math error.
Measuring and Cutting Wood Without Losing Your Mind
Look, I’ve been there—staring at a piece of lumber with a tape measure in one hand and a mounting sense of dread in the other. The biggest mistake I made when I first started measuring and cutting wood was assuming “close enough” was actually close enough. It’s not. If you’re off by even a sixteenth of an inch, your entire frame is going to wobble like it’s had too much espresso. My golden rule? Measure twice, cut once, and then measure a third time just to be safe. It feels tedious, but it’s the only way to avoid the heartbreak of turning expensive wood into expensive kindling.
When you finally pick up the saw, don’t try to rush the process to meet some imaginary deadline. I used to think speed meant skill, but I quickly learned that slow and steady wins the race when it comes to straight lines. If you’re working with a hand saw, use a square to draw your lines first; it’s your best friend for keeping things level. Also, remember to account for the “kerf”—that’s the tiny bit of wood the saw blade actually turns into sawdust. If you don’t factor that in, your pieces will end up slightly shorter than your plans intended.
5 Real-World Lessons I Learned the Hard Way
- Don’t skimp on the screws. I once tried to save three dollars by using whatever was left in my junk drawer, and let’s just say my books ended up in a heap on the floor. Buy decent wood screws; your future self will thank you.
- Measure twice, cut once, and then measure a third time just to be safe. There is nothing more soul-crushing than realizing you’re a quarter-inch short after you’ve already made the cut.
- Sanding is the part everyone hates, but please don’t skip it. If you don’t sand those edges down, you’re going to end up with a permanent splinter in your thumb—or worse, a snag in your favorite sweater.
- Use a level. I know, I know, it feels like overkill, but a bookshelf that leans slightly to the left is just a glorified pile of lumber. It’s better to spend five minutes leveling it now than to stare at a crooked mess later.
- Leave room for error. If you’re planning a shelf that fits perfectly into a nook, aim for a tiny bit of wiggle room. Walls are rarely perfectly straight, and trying to force a “perfect” fit is a recipe for a headache.
The Bottom Line: Keep It Functional, Not Fancy
Prioritize stability over aesthetics; a slightly uneven shelf is fine, but a wobbly one that collapses under your hardcovers is a disaster.
Don’t let “tool envy” stall your progress—if you have a measuring tape, a saw, and a way to join the wood, you have enough to get the job done.
Measure twice, cut once, and give yourself permission to make mistakes; the goal is a sturdy piece of furniture, not a museum-quality masterpiece.
## The Real Goal
“Stop worrying about whether your shelf looks like a magazine spread; if it stands straight, holds your heavy hardcovers, and didn’t cost you a month’s rent, you’ve already won.”
Maya Sterling
The Finish Line (And What Comes Next)
At the end of the day, building this bookshelf isn’t about achieving some master craftsman status or creating a museum-quality centerpiece. It was about the grit: getting your measurements right, wrestling with the saw, and choosing the tools that actually work for you instead of the ones that look cool in a catalog. You’ve moved from a pile of raw lumber to a functional piece of furniture that belongs in your home because you actually made it. Remember, if a screw is a little crooked or the wood has a tiny knot, it doesn’t mean you failed; it just means you didn’t buy it from a big-box store.
As you start loading up your favorite novels and those half-finished journals, I want you to take a second to look at what you’ve done. There is something incredibly grounding about looking at a physical object and knowing, “I built that.” Don’t let the fear of a messy workspace or a few mistakes stop you from starting your next project. Life is way too short to wait for the “perfect” moment or the perfect set of tools. Just grab your gear, embrace the beautifully imperfect process, and keep building a life that works for you.
Frequently Asked Questions
How do I stop my bookshelf from wobbling or leaning to one side once it's finished?
Nothing kills my momentum faster than a shelf that feels like a Jenga tower. If yours is leaning, don’t panic—it’s usually just a lack of lateral support. The quickest fix is adding a back panel; even a thin piece of plywood screwed into the frame makes a massive difference. If you want to skip the wood, just add some corner braces or a sturdy L-bracket to the wall. Stability over aesthetics, always.
What’s the cheapest way to finish the wood so it looks decent without spending a fortune on stains or paints?
Honestly, don’t get sucked into the trap of buying expensive, specialized stains. If you want that “expensive” look on a budget, grab a can of matte polyurethane or even a simple beeswax polish. It seals the wood and makes it feel smooth without the heavy chemical smell. If the wood looks a bit patchy, a quick sanding with fine-grit sandpaper before applying a clear coat works wonders. It’s not about perfection; it’s about protection.
Is it actually safe to put heavy hardcover books on these shelves, or am I going to need to add extra support?
Honestly, if you’re planning on loading these with heavy hardcovers or those massive art books, don’t just wing it. A single shelf span can start to sag pretty quickly under that kind of weight. To keep things from bowing, I’d definitely add a center support cleat or a vertical divider. It’s not the most “minimalist” look, but it beats the heartbreak of watching your collection slowly slump into a curve.
